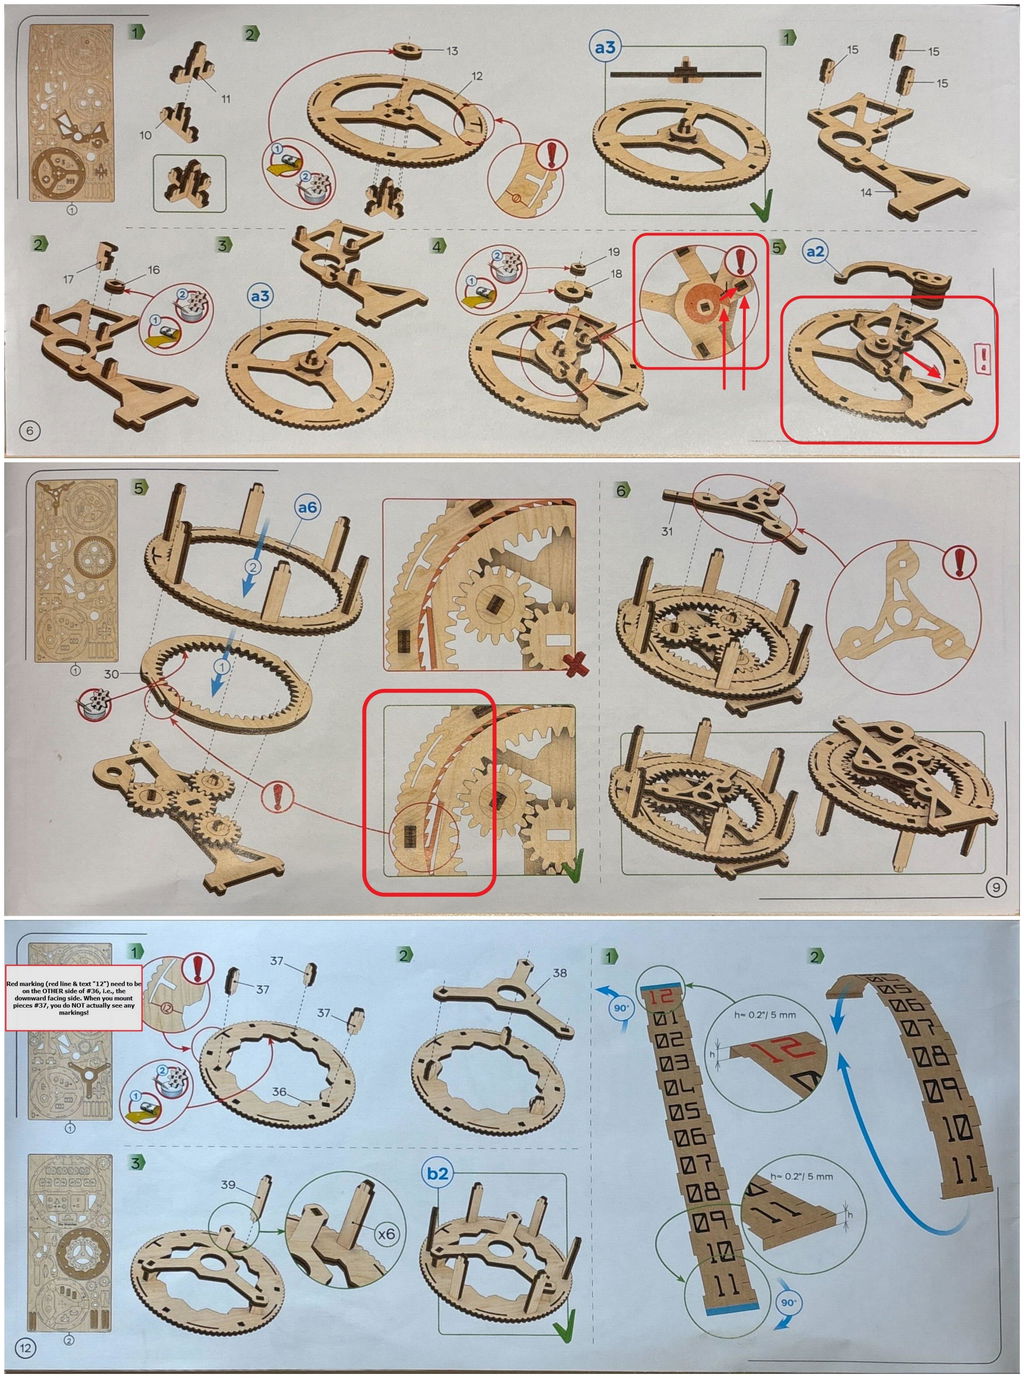
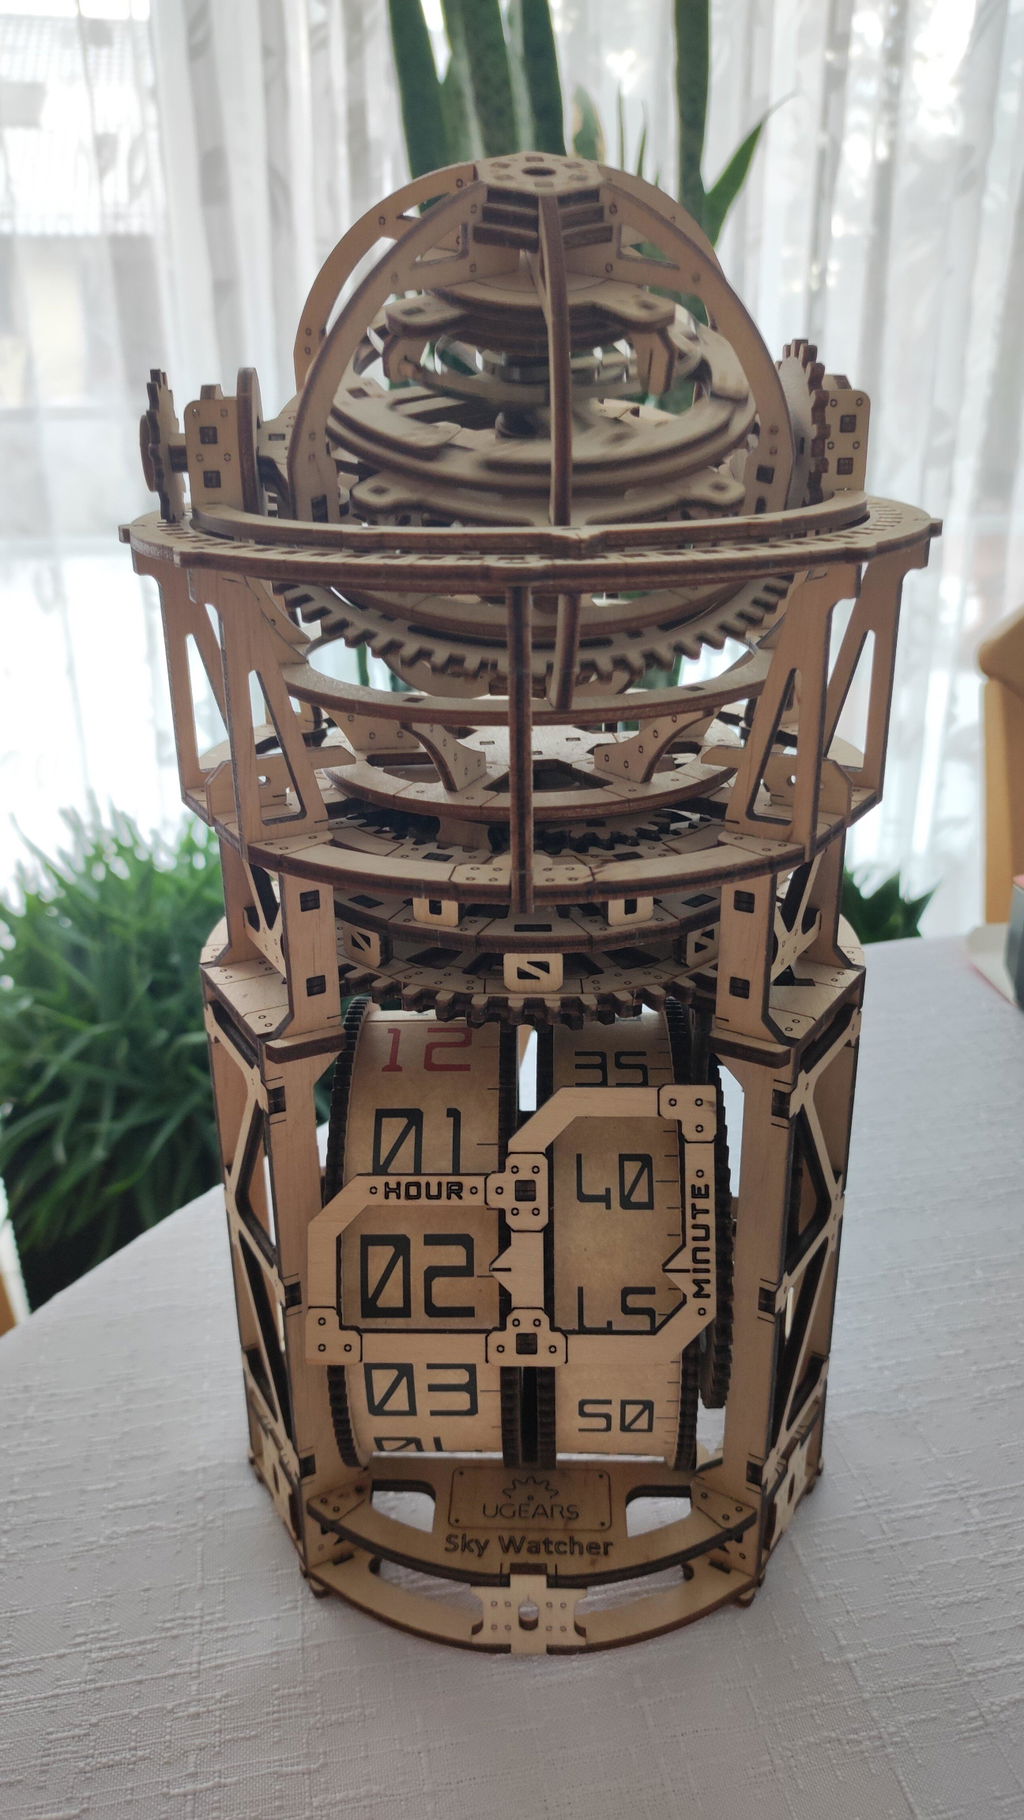
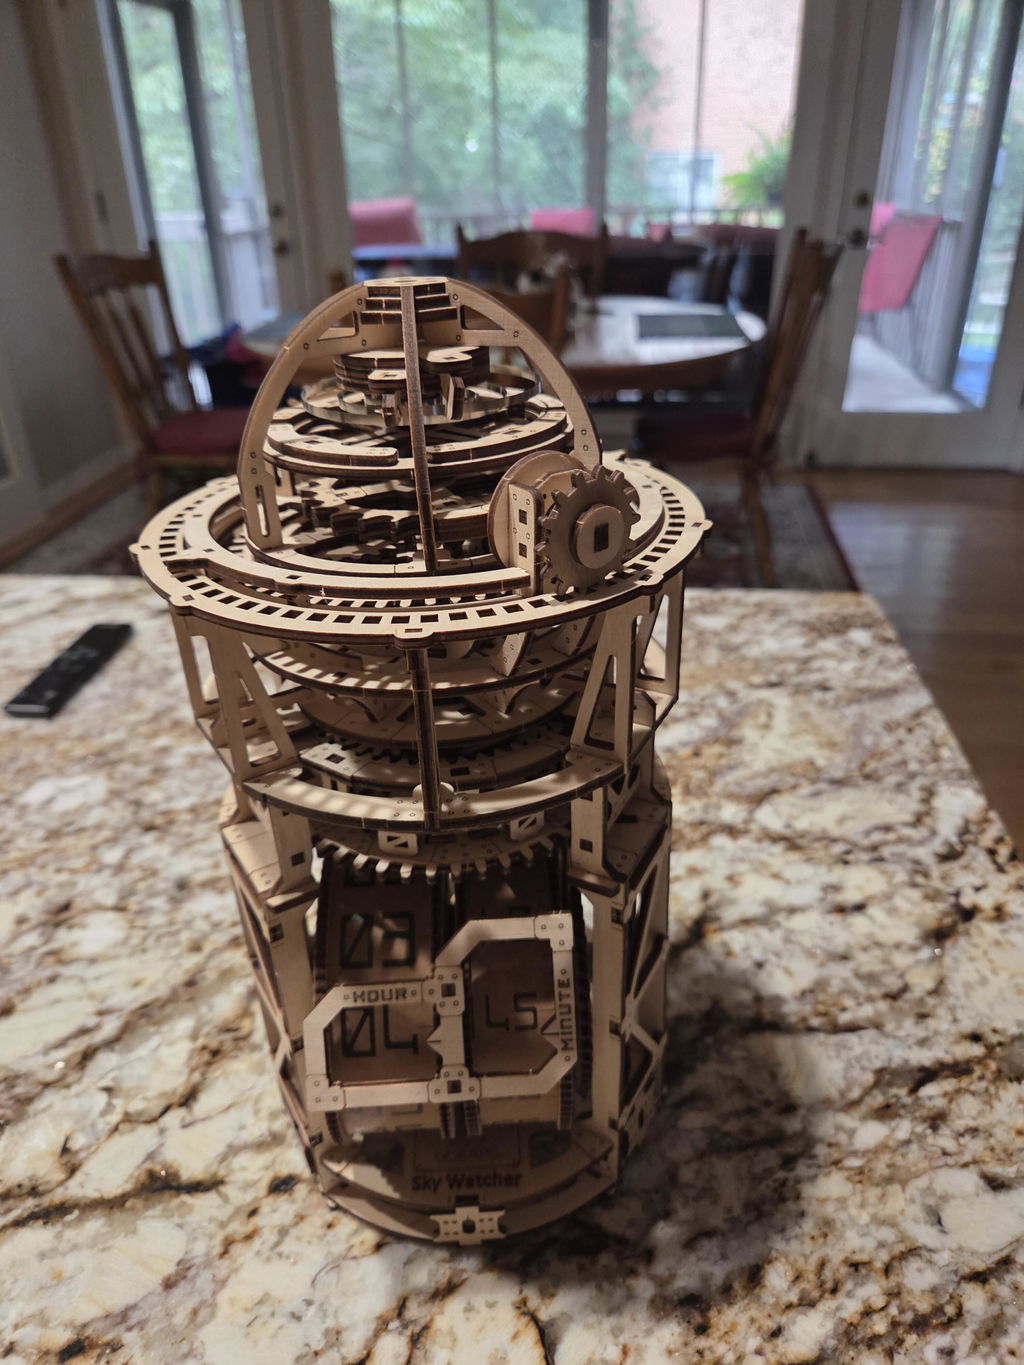
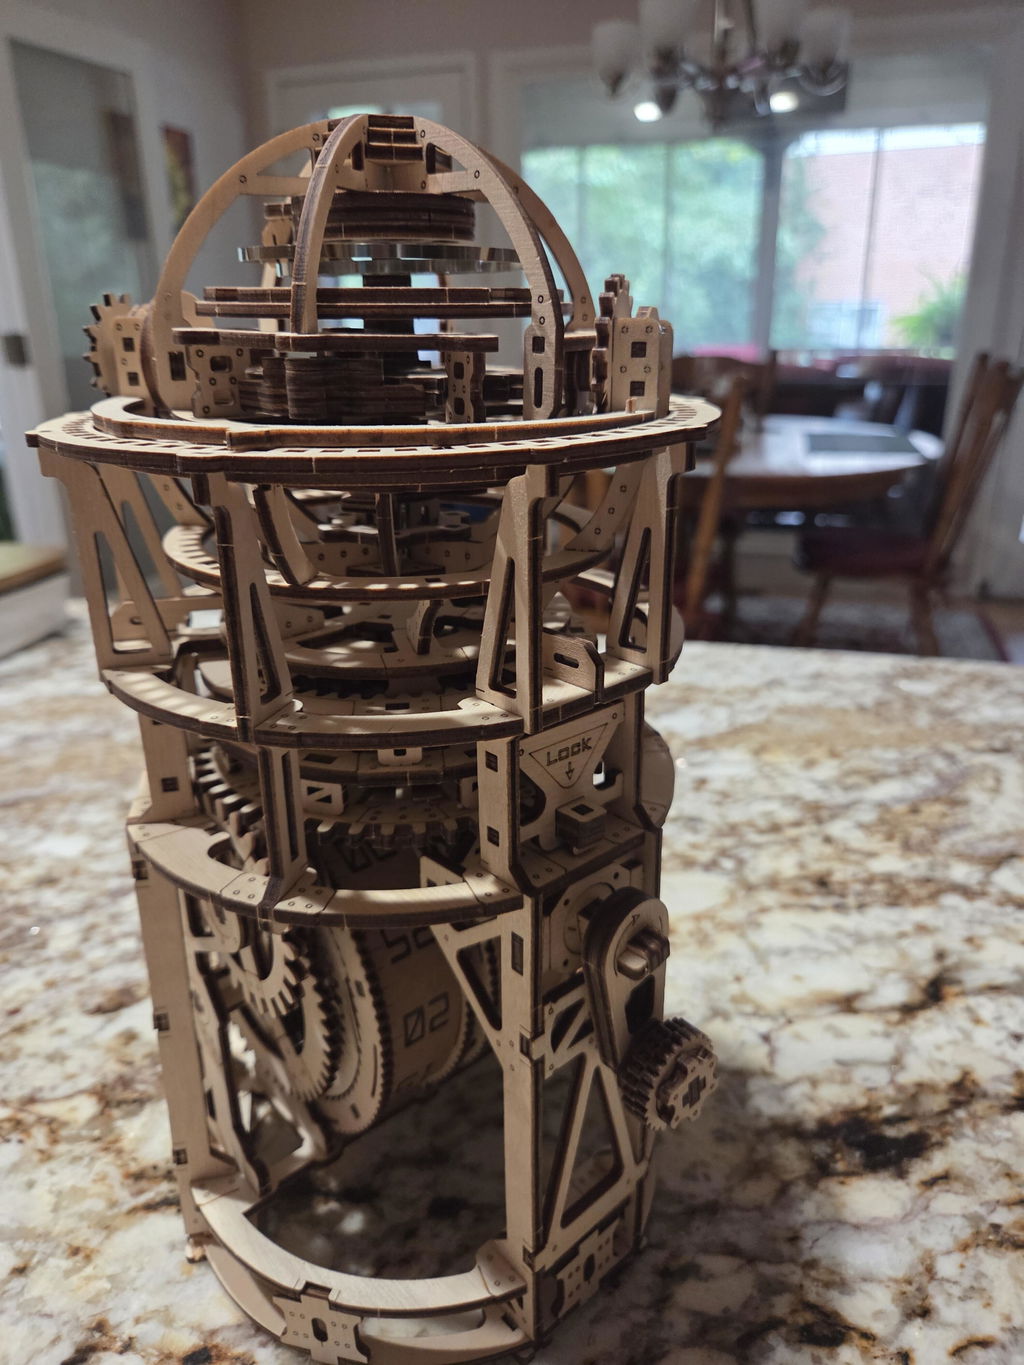
Sky Watcher Tourbillon Table Clock
Couldn't load pickup availability
Sky Watcher Tourbillon Table Clock
Assemble me. Catch the star moment!
The Clockwork Universe theory, favored by 17th-century deists, held that the Earth and the heavens, and all their motions, were like a giant clock, with God as the Clockmaker. Newton's three laws of motion and the principle of universal gravitation were thought to be sufficient to explain phenomena of any kind, using mechanical conceptions. At Ugears we love mechanical conceptions! And so with a nod to Isaac Newton, we present the Sky Watcher Tourbillon Table Clock, a fascinating combination of imaginative celestial observatory and functional table clock!
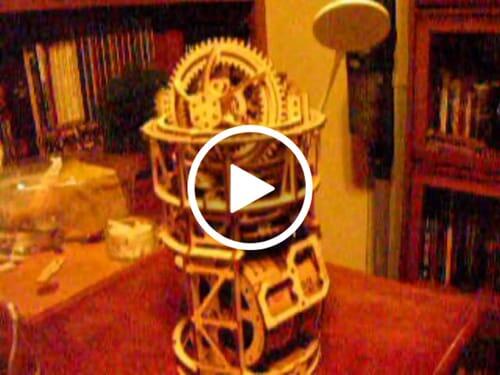
 The standout feature of this functional and beautiful wooden model table clock is the rotating tourbillon that sits on top. In wrist and pocket watches a tourbillon mechanism helps increase accuracy by counteracting the effects of gravity when the watch is stationary. By seating the escape and balance wheel within a rotating cage, slight errors in timekeeping introduced by the force of gravity are averaged out. In table clocks and wall-mounted clocks a tourbillon often serves a more decorative purpose. This is true of the Sky Watcher Tourbillon Table Clock from Ugears, where the sphere of the tourbillon has been styled to resemble a large telescope observatory scanning the celestial sphere, like those at Mauna Kea in Hawaii. Perhaps it is creating a map of the heavens? Conducting infrared studies? Or maybe searching for new planets or signs of intelligent life?
 Sky Watcher features:
- Functional mechanical table clock
- Powered by a spring motor
- Moving tourbillon on top with 3 axes of rotation
- Time display on rotating reels
- Celestial observatory design
 DIY wooden clock features:
- Works approximately 2-3 hours per full winding
- Pleasant background ticking sound
- Assembles without glue or tools
- Comes with step-by-step instructions in 11 languages
- Free spare parts upon request