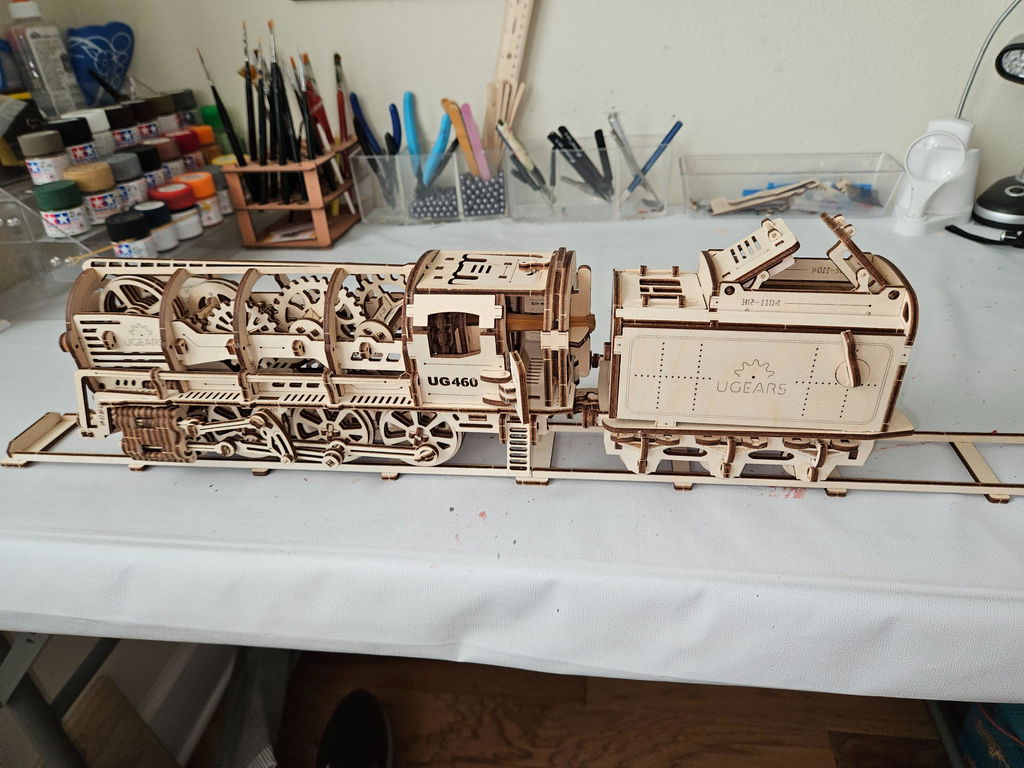
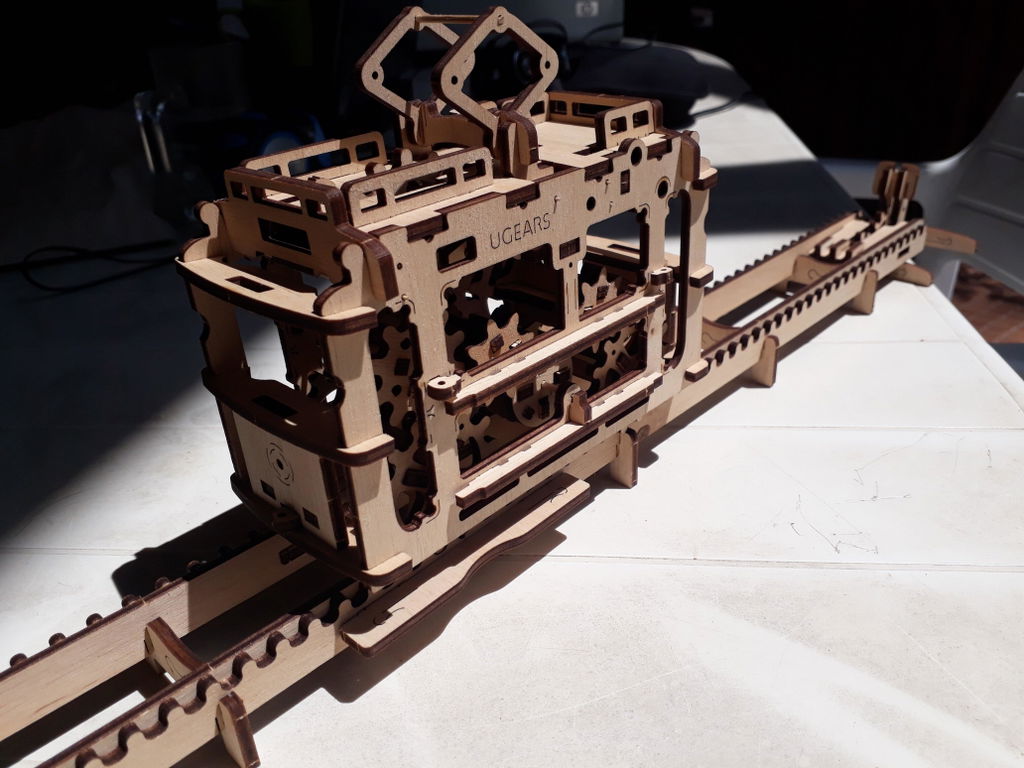
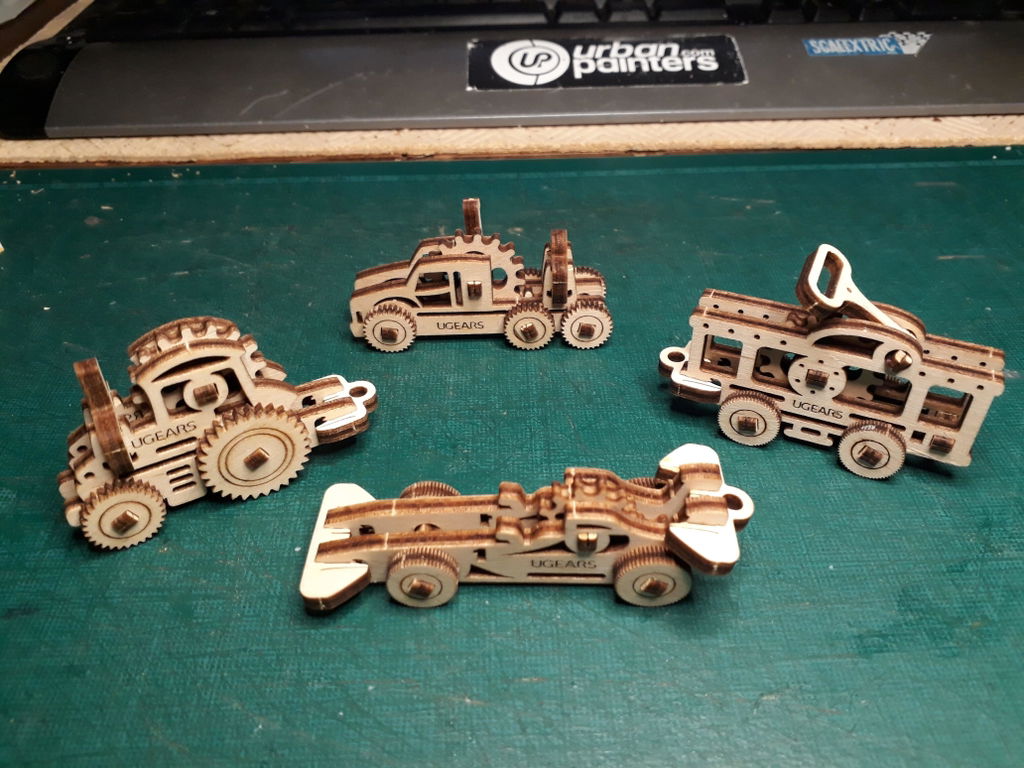
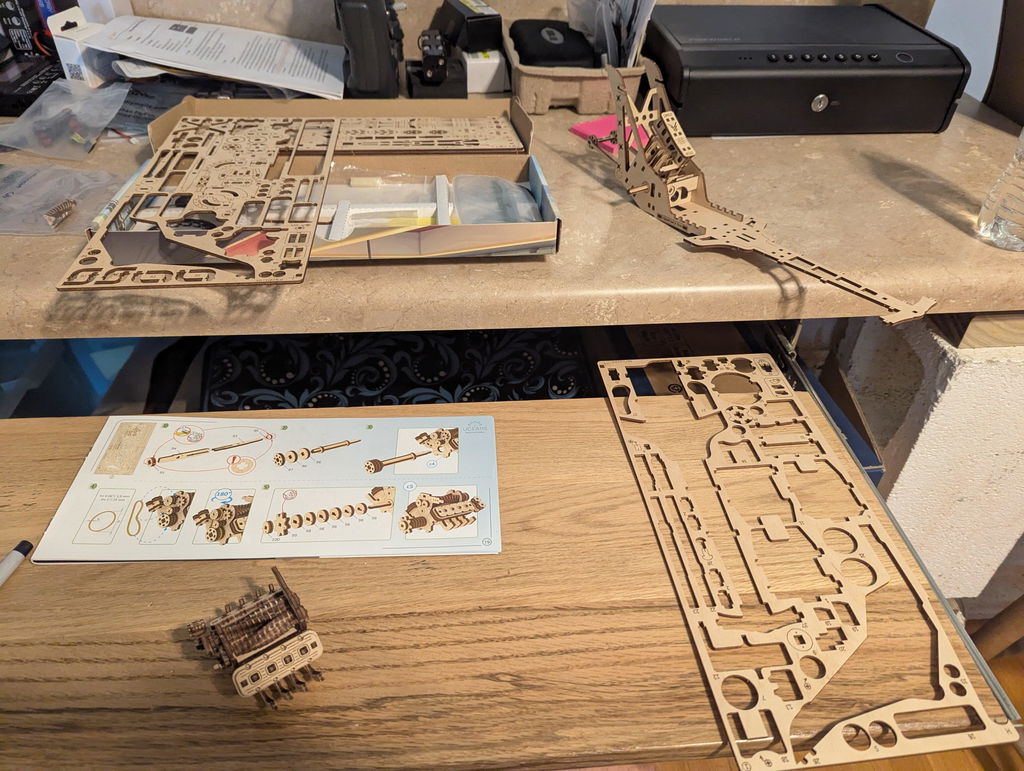
I am writing about the UG460 puzzle. It must be an earlier version. It was fun building the train. The tender works perfectly. The only hard part was that most of the big pieces were very tight fits - sand and wax all inserts along with gears and wheels. Make sure the bottom section fits properly into the top section to make the gears match up. Recommend this train puzzle.
Tökéletesen működik, nagyon szép modell. Remélem több ehhez hasonló modellt ad majd ki az Ugears, mert szeretem az ilyen nagy darabszámmal rendelkező modelleket.
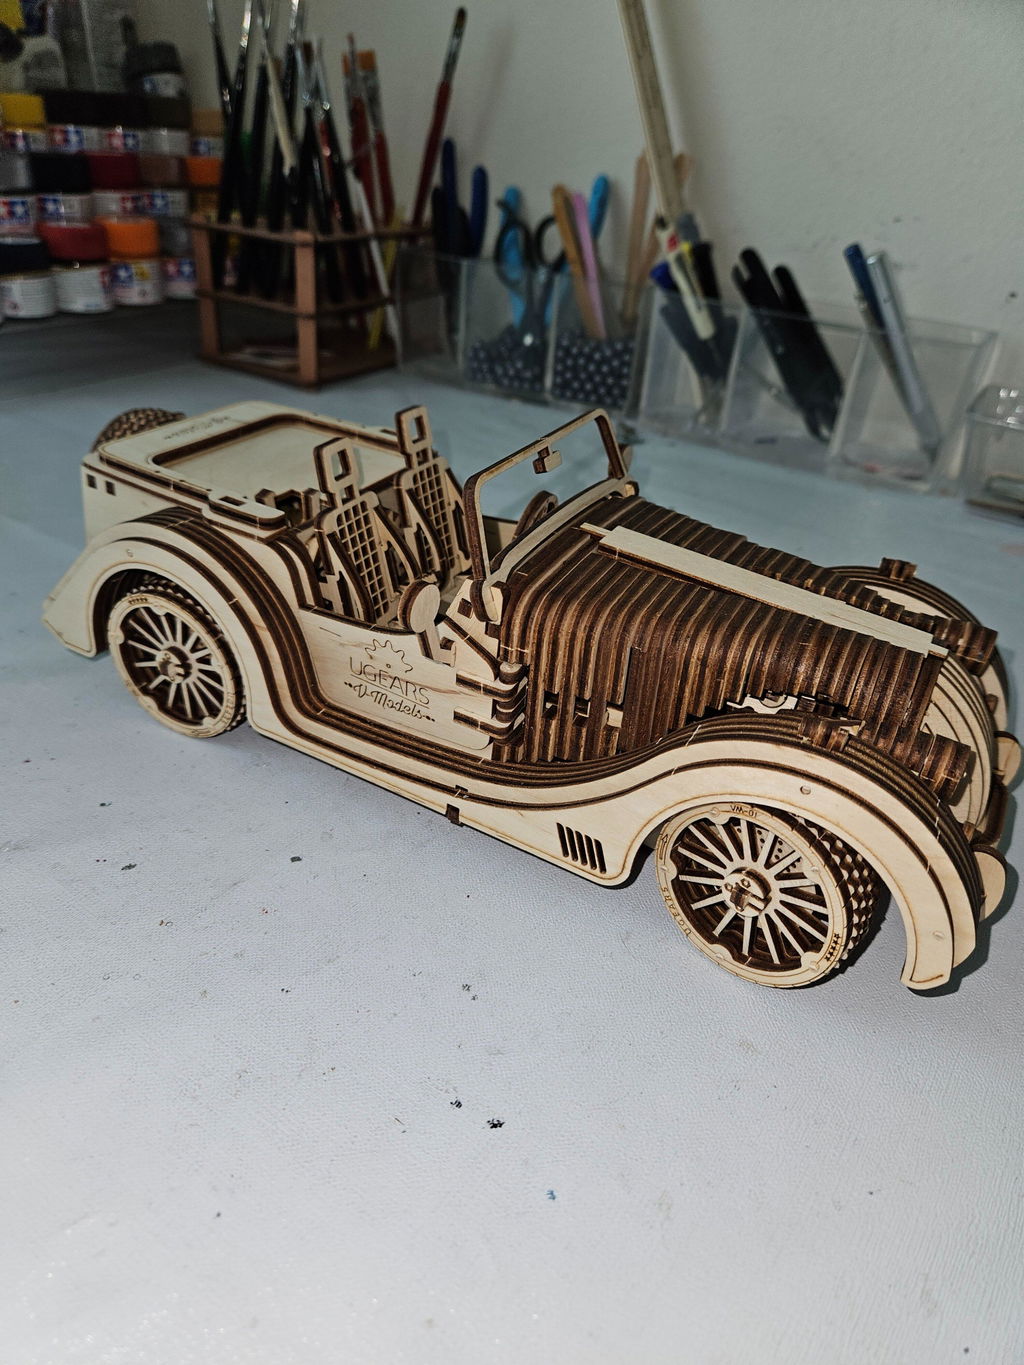
Très joli kit,facile à assembler.
Les tulipes ont tendance à se casser lors de leur pose dans la caissette
,une goute de cyanoacrylate a réglé le problème.
Beau kit nécessitant une mise au point afin qu'il fonctionne correctement.
Certains assemblages sont un peu lâches ce qui nuit à la rigidité de l'ensemble ,du moins sur l'exemplaire que j'ai monté.
Très ludique en tous cas ;)
Superbe kit, facile à assembler.
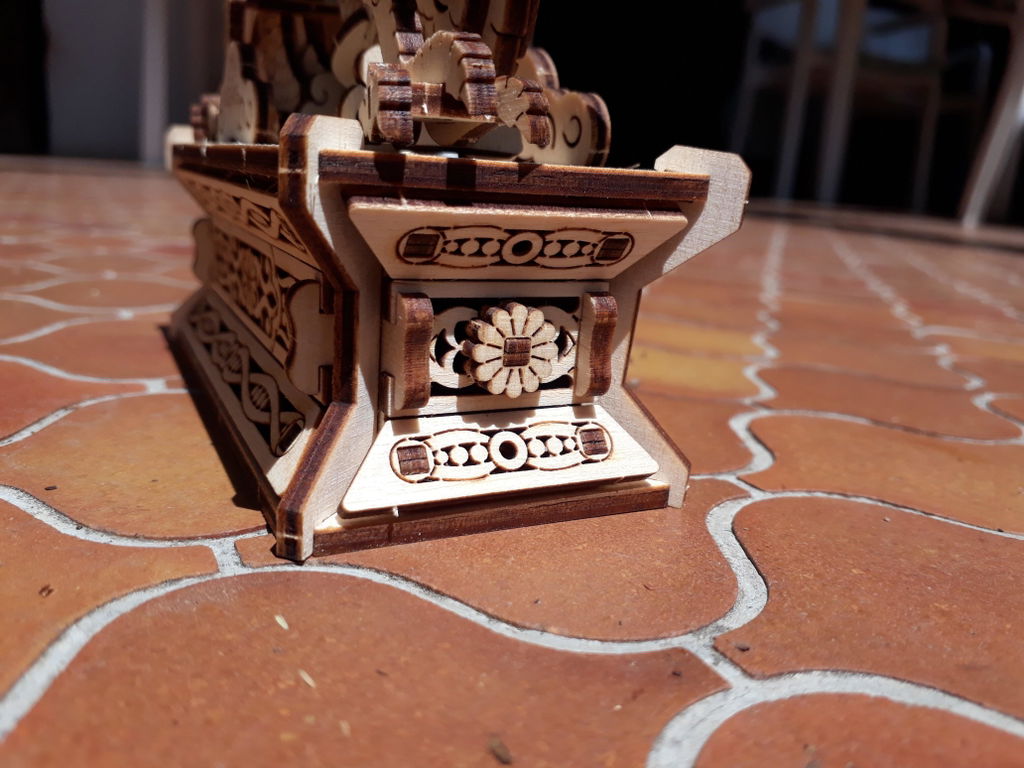
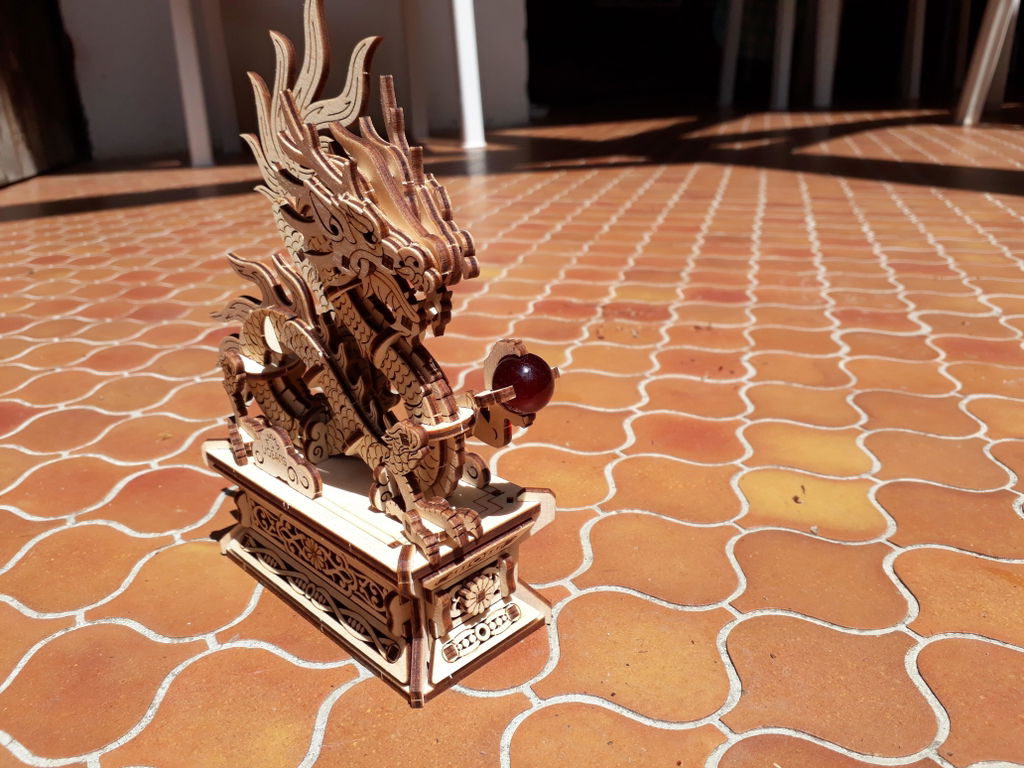
J'ai ajouté la rosace en "+" sur la façade du tiroir afin d'augmenter l'illusion ;)
Enjoy Ugears

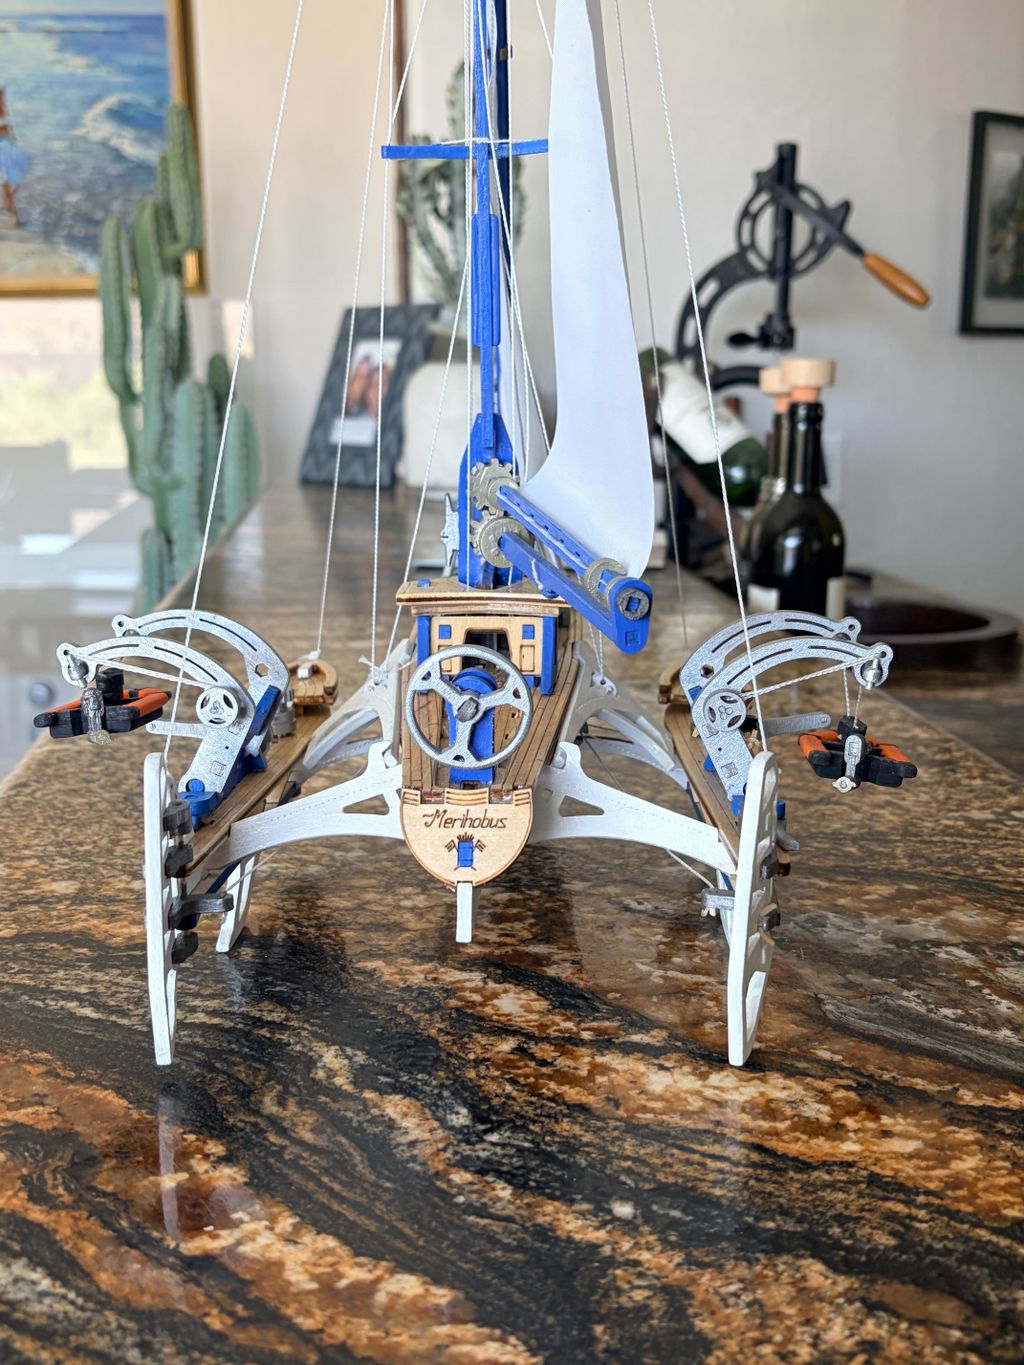
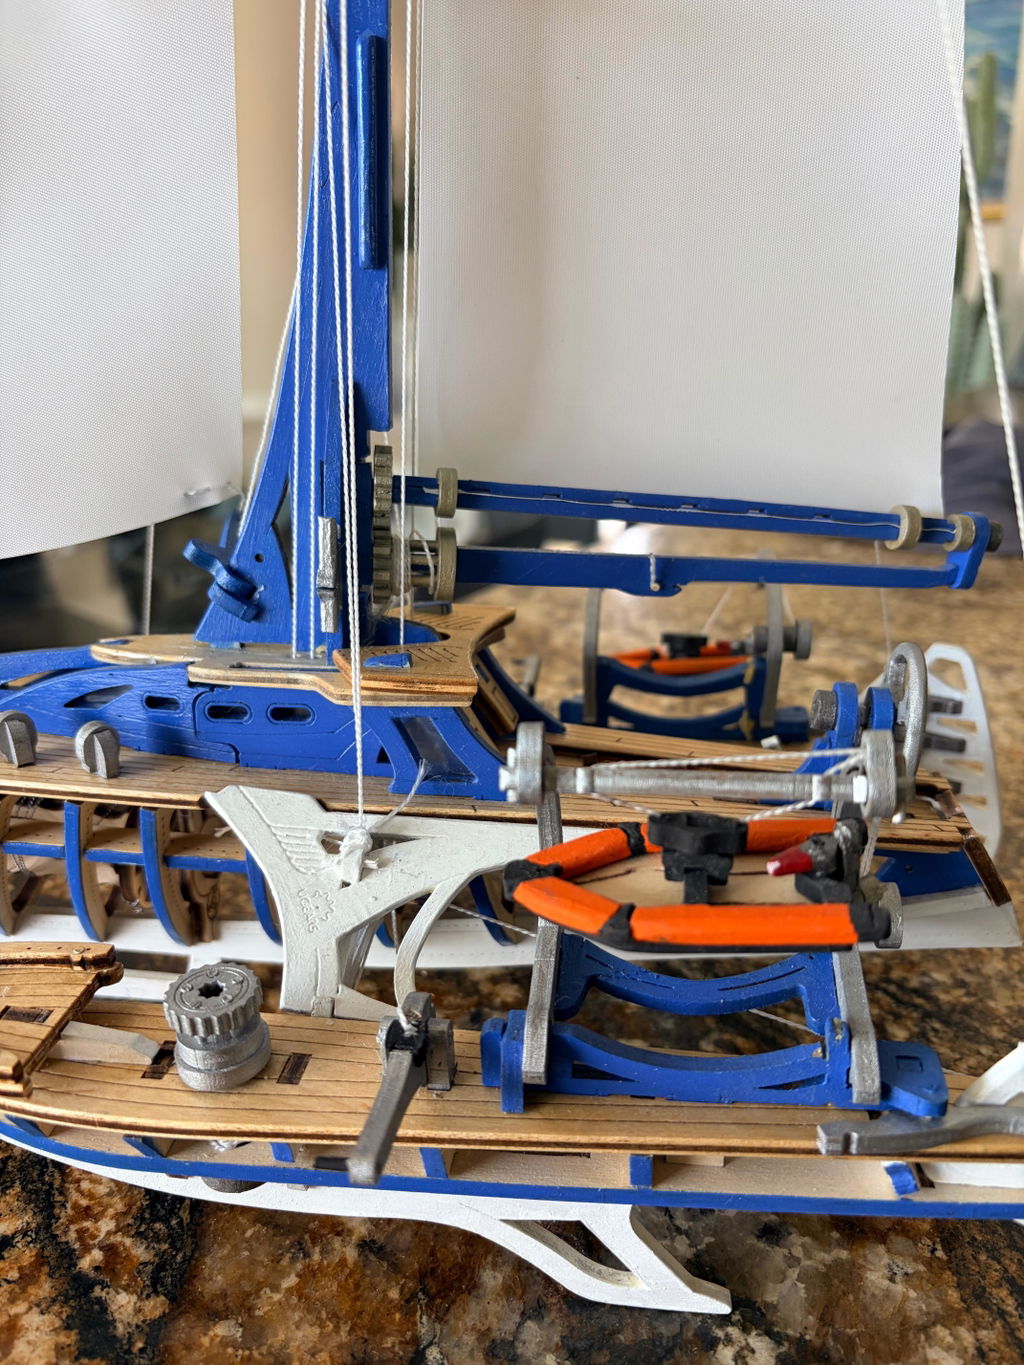
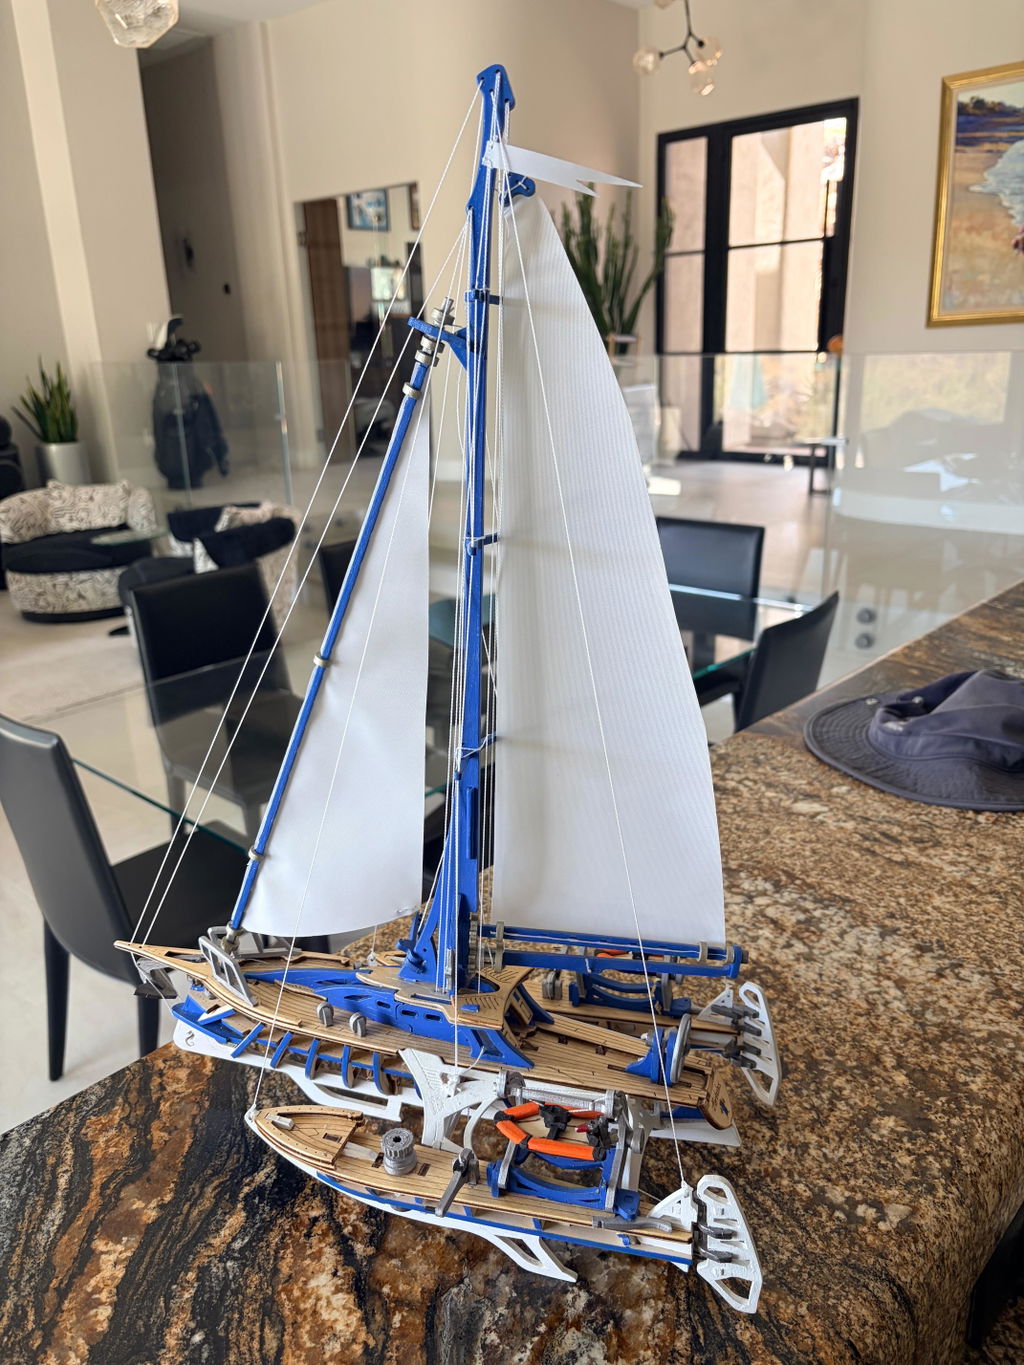
I love the rigging and actual connections to all the moving parts. This sailboat was great as a build, but paint put it over the top! One of my favorites from UGears!
Greg T
An excellent puzzle! It is far more complex than I had thought, and that made it really fun to build! It runs perfectly, and fun to show. Highly recommended!
Cute fidget toys. Assembly is simple with straight forward instructions that includes photo directions, which is helpful for children to be able to assemble on their own. Good product, and great customer service. The price is right, and the toys hold up very well. A+ experience.
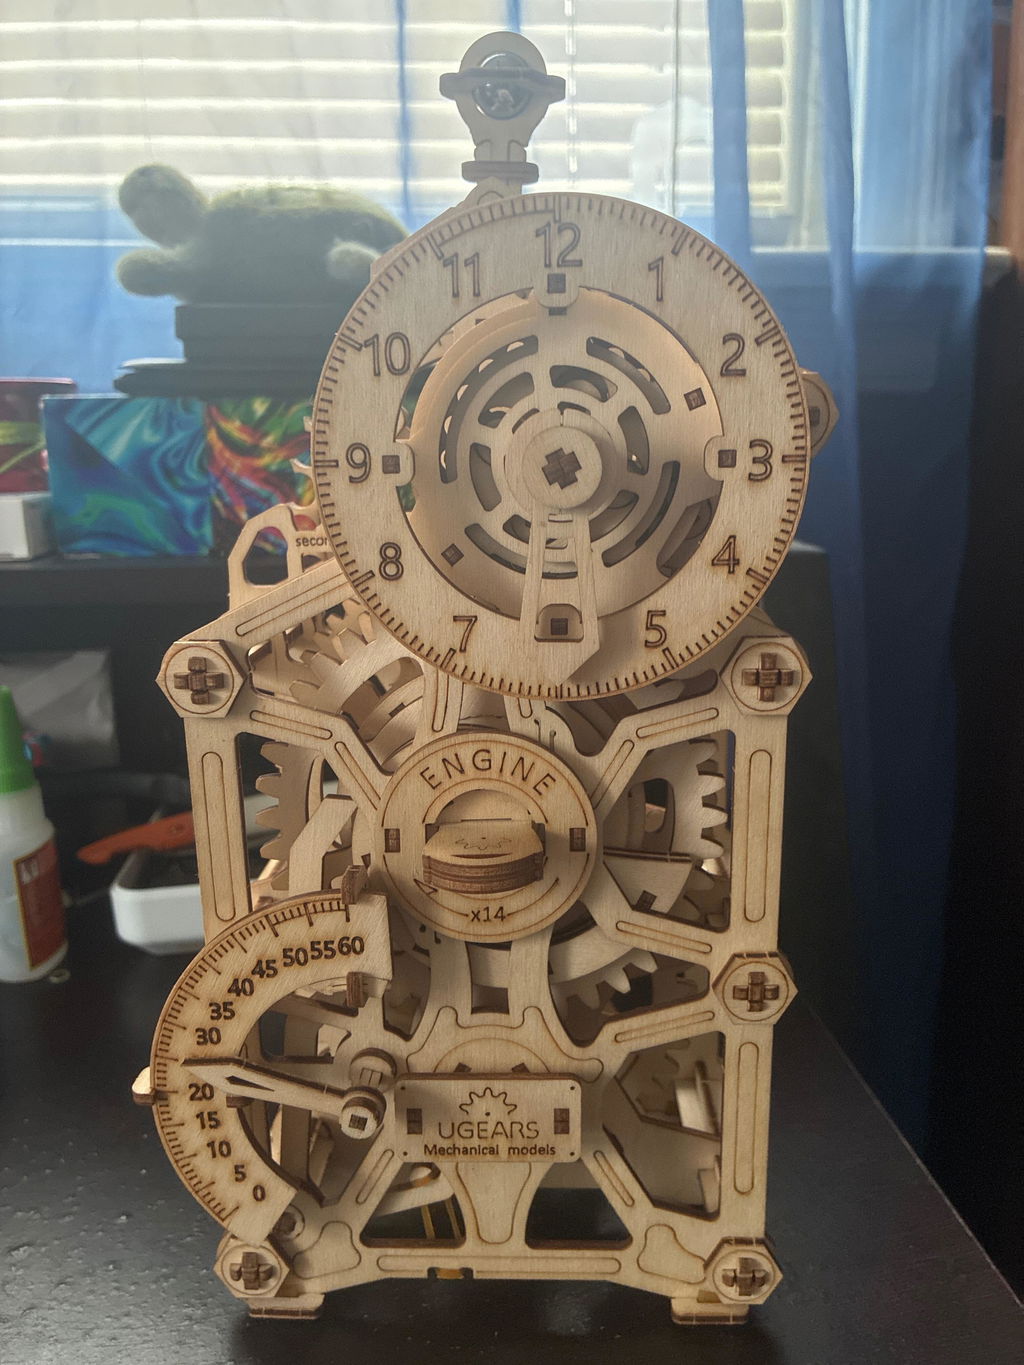
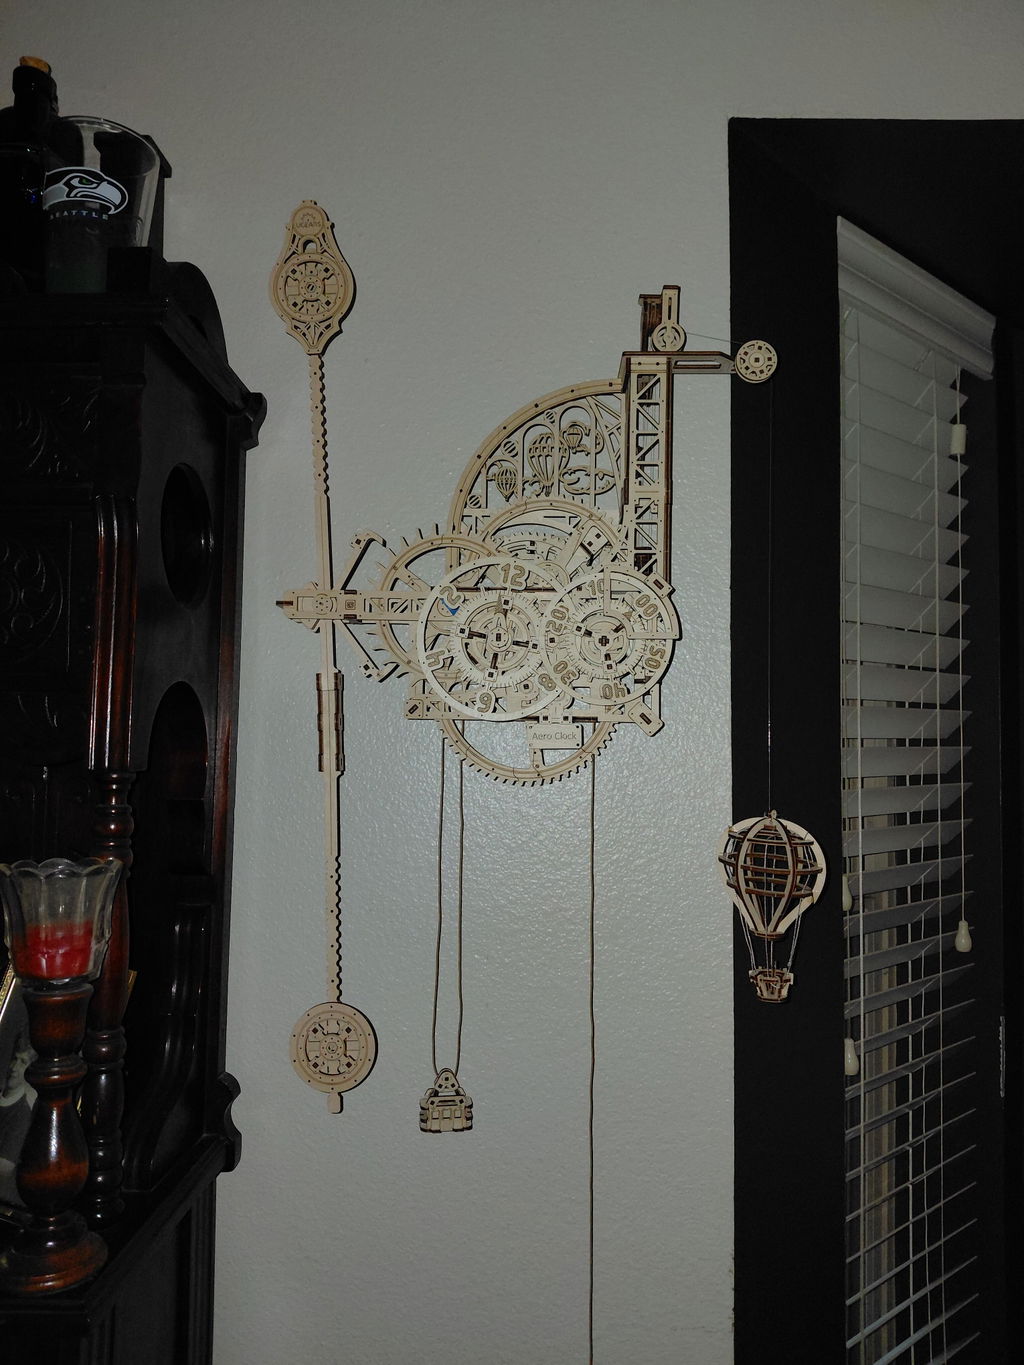
Over all pretty neat and I did kinda broke two things one was early fixed with wood glue one not so much but it still worked without the top little engine thing, and the hour and seconds are easily adjustable but the minute hand not so but and can be a bit of a pain. In total I still like it.
:)
Too many toothpicks; Too many rubber bands. All my ugears puzzles except this one didn't rely on rubber bands and toothpicks. Too much. I had trouble with engine/instructions and removing parts. Not typical Ugears puzzle that I really like. Disappointment. Does not work. But looks really nice on a shelf
I have assembled several UGEARS puzzles. This one was very difficult and many parts were fragile and I broke several during assembly.
To be fair, there tech support was great and sent out replacement parts.
After final assembly the gears didn't mesh properly and so the mechanism as flawed. Could have been my fault. I don't know...
Just be aware...

Dear Charles.
Thank you for your review.
If you need help with assembly, feel free to contact us at customerservice@ugearsmodels.com.
When I opened the box, I saw toothpicks. Ugears and toothpicks. Not a good mix. I had one toothpick left. Toothpicks are not good. Black rubber bands kept coming off wheel(s). Part were extremely hard to put together. I had to put together parts half way because I was afraid of breaking them. Very tough to wind and run. It looks great on the shelf though.
I really enjoyed making this.
The level of detail is amazing
I have never done anything like this before and I found it very easy and straightforward. Instructions are very easy to follow. I love how the staircases move.
Would 100% recommend
The puzzle is pretty straight forward. Everything fit. The chain fit really good. The first time I wound the spring, it was sticking but still moving the gears. The second time I wound the spring, the spring 'sprung'. I can't wind it and the gears are slipping so I can manually push the three-wheeler. It still looks great.
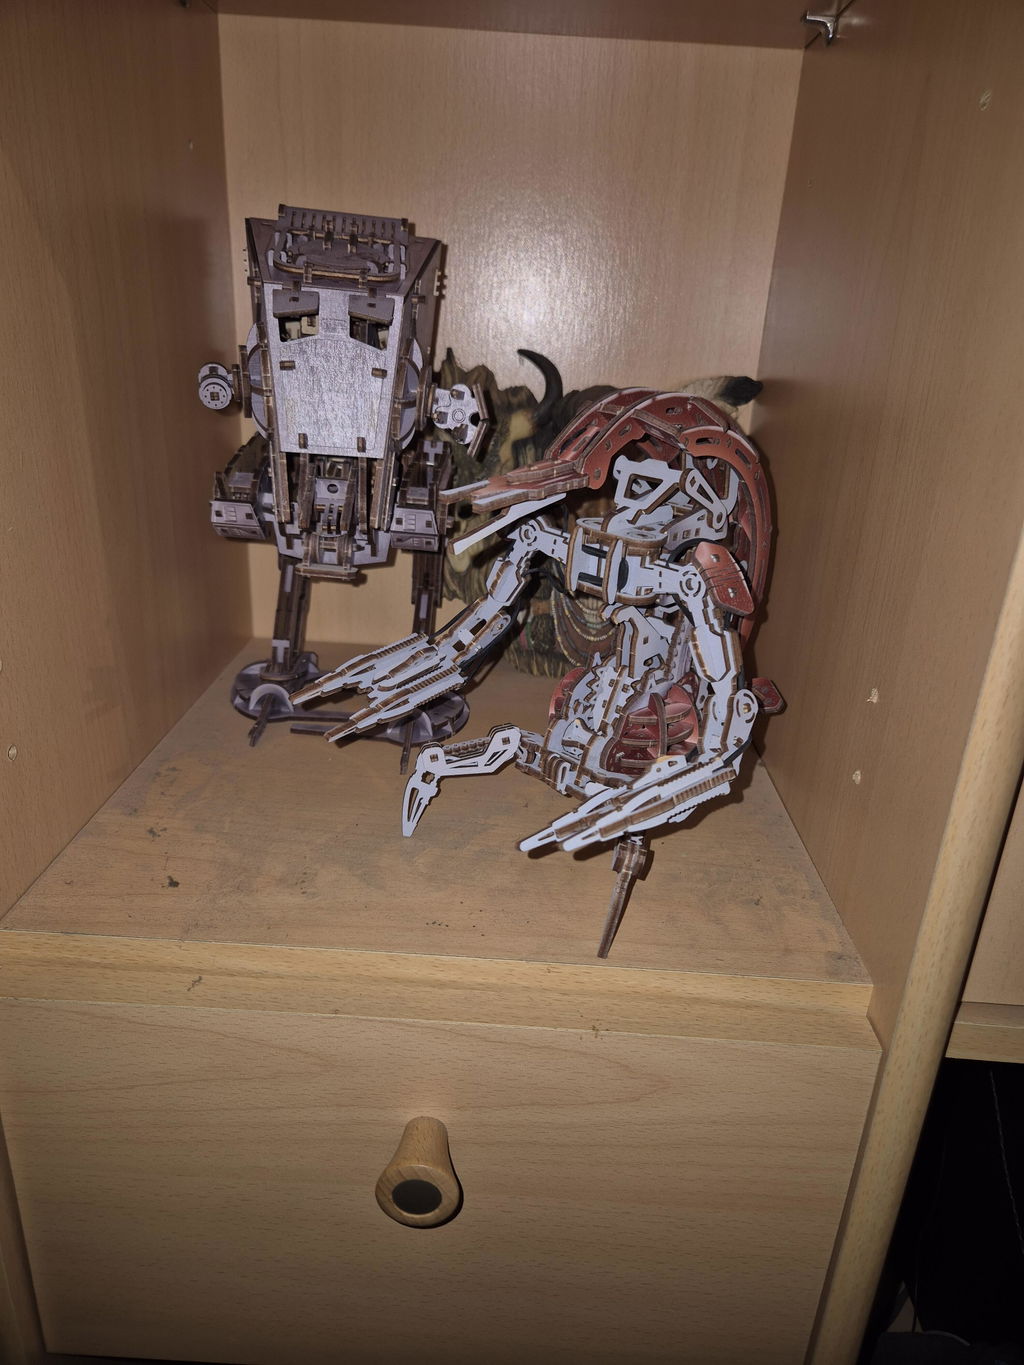
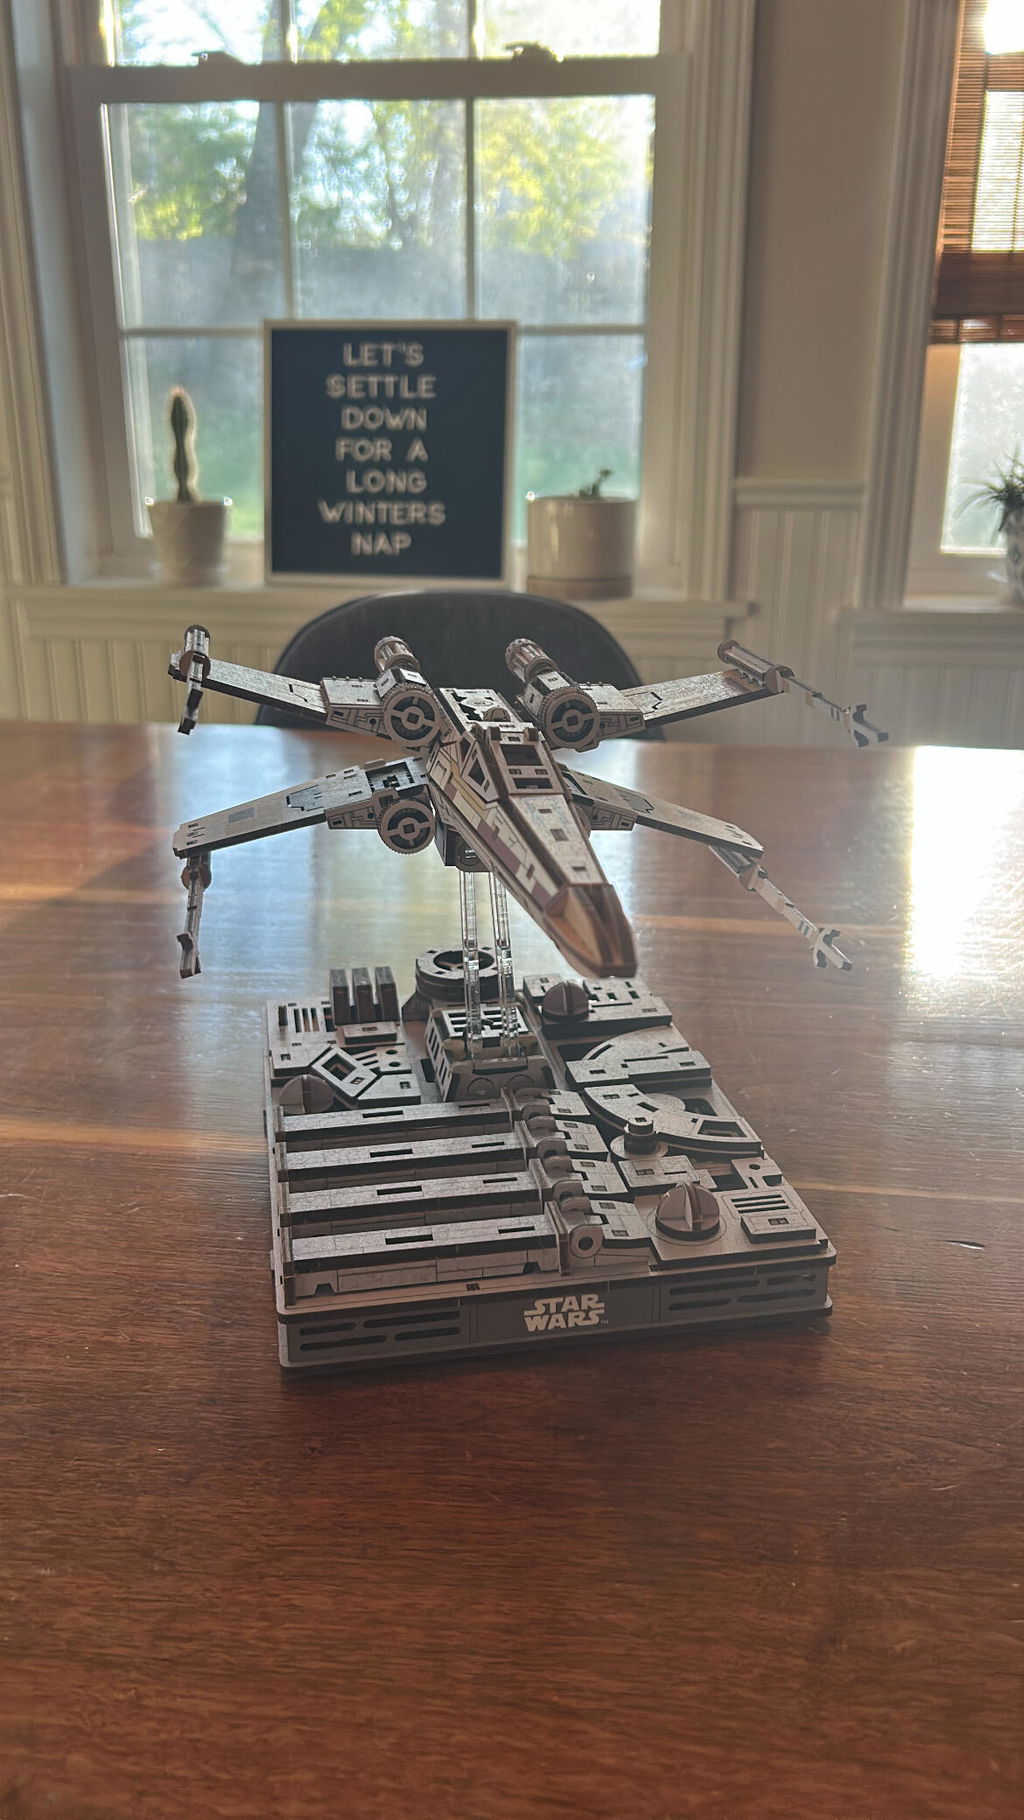
This is the second Ugears piece I’ve bought for my husband as a gift and once again he was THRILLED. The quality is great, instructions are clear, nothing was missing or damaged, and the end result was even better than he anticipated. He was so scared to flip that switch to turn it on the first time, he thought maybe it wouldn’t work, but it DID work and his jaw actually dropped watching it sway back and forth. What a perfect moment for him (and his kids and me to watch!) as a huge Star Wars fan and lover of building all kinds of things. I have a feeling I’ll be buying Ugears stuff as gifts for him for many years to come!
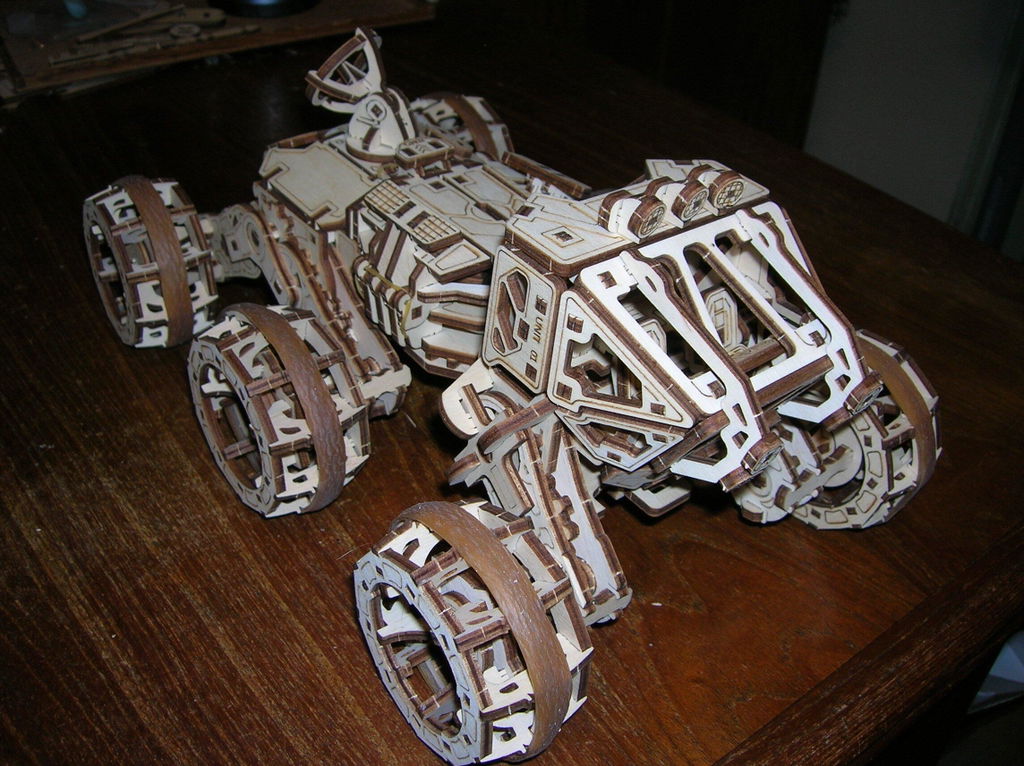
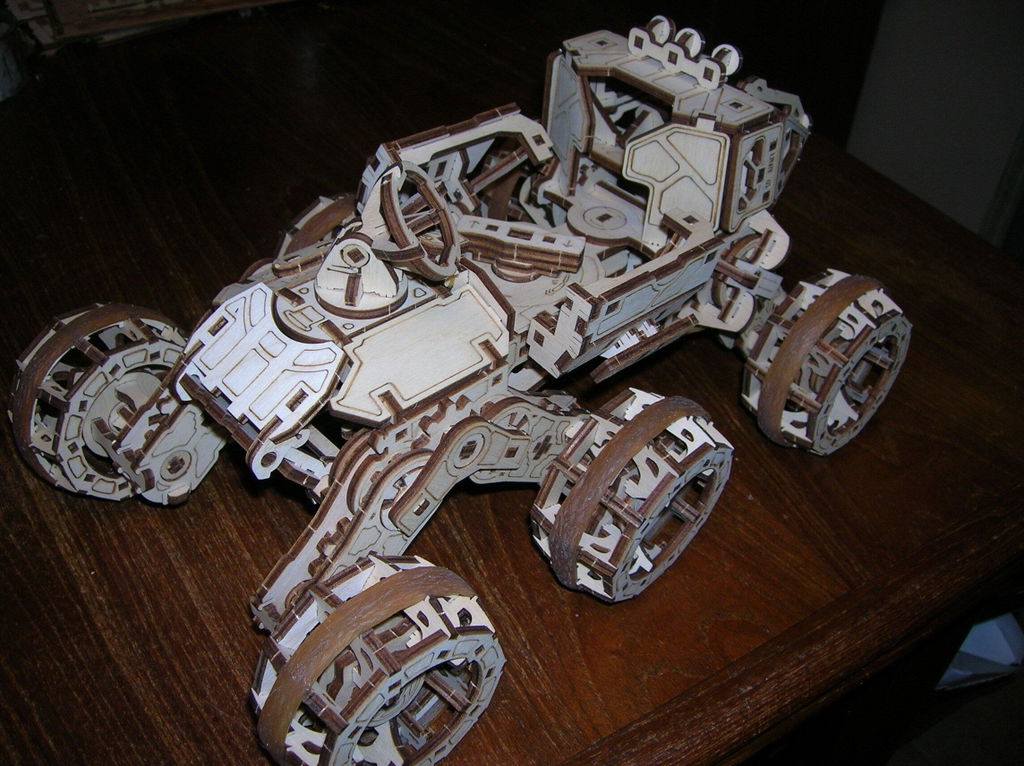
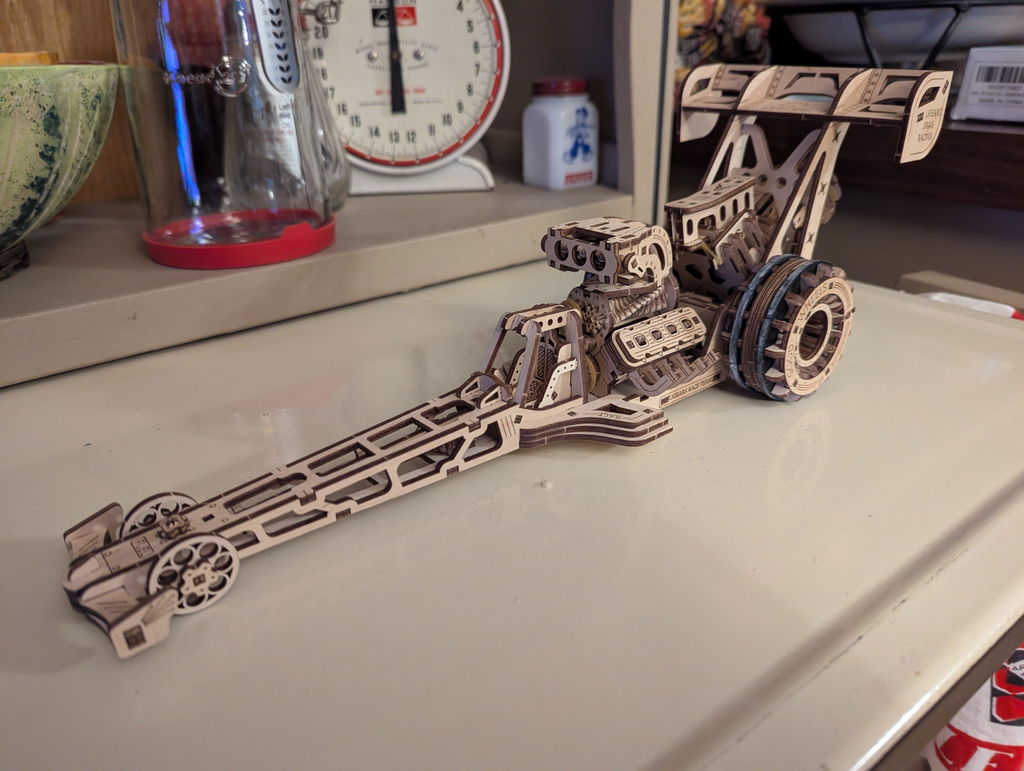
This is a really good puzzle. Everything works. It speeds down the 'road' quickly, going 25 feet. Parts fit a bit tight but that's a lot better than loose. Great job!!!!!
Absolutely love it went together with the ease I would most definitely recommend this model I think it's a great starter piece for people that are just getting into building this is like my 12th one and it only took me a couple of weeks of building on my days off.
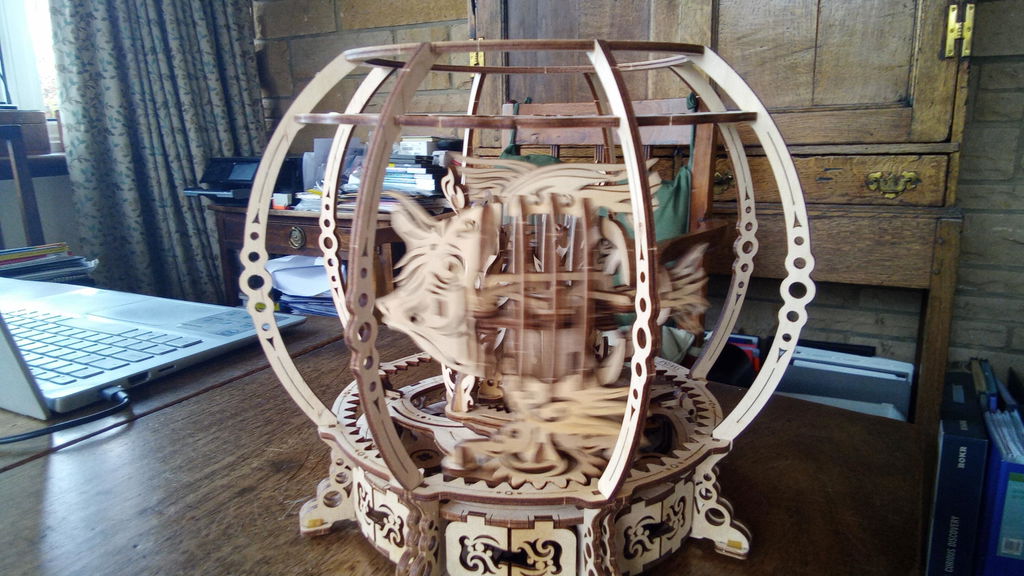
Ingenious linkage inside the "fish" allows them to "swim" when they rotate round the "tank". Two minor problems were incurred.
1) The pre-wound spring was tricky to locate in its split wheel, even with the tool allowing the builder to unwind it from the centre.
This was solved successfully, by pushing the centre turn sideways, then rotating the whole assembly round and round, rewinding each turn outside the previous one, until all was wound onto the small wheel.
2) The release escapement (a block of three layers), which was a bit sticky at first, needed careful sanding so the pivot was free to allow movement.
Haven't got it working yet. My a2 part on page 10 is only going one direction. It's like its stuck on something and I can't figure out what. I also broke my release lever, so I don't know maybe that's part of my issue. Hoping I can get the a2 part working as it's not a clock without it moving.Any suggestions would be appreciated.
Hey there
Thank you for your feedback
Please contact our cupport for help with assembling: customerservice@ugearsmodels.com
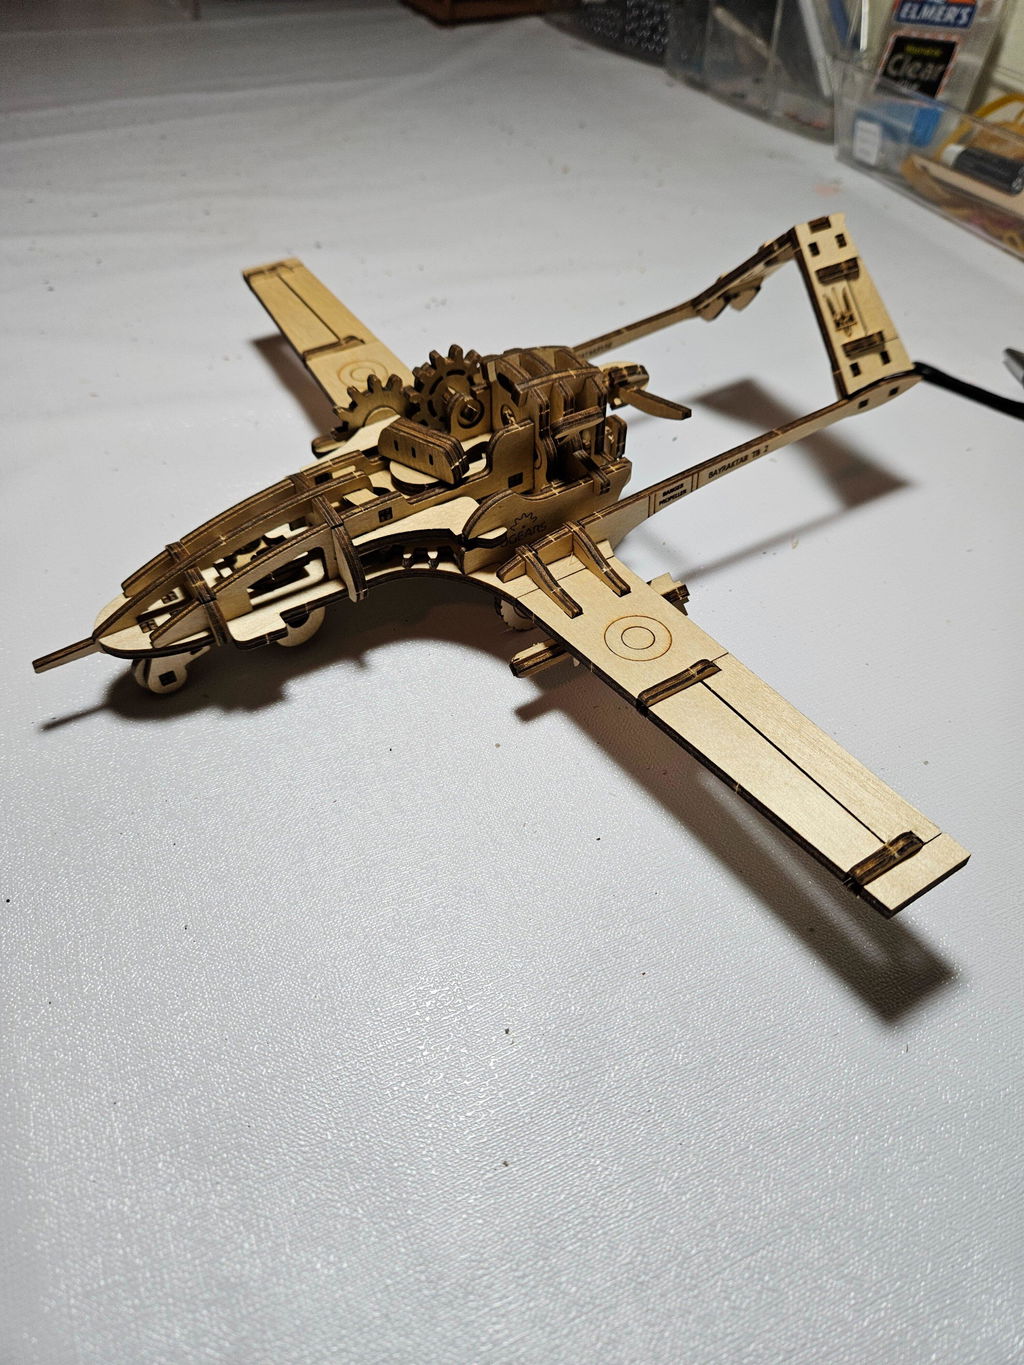
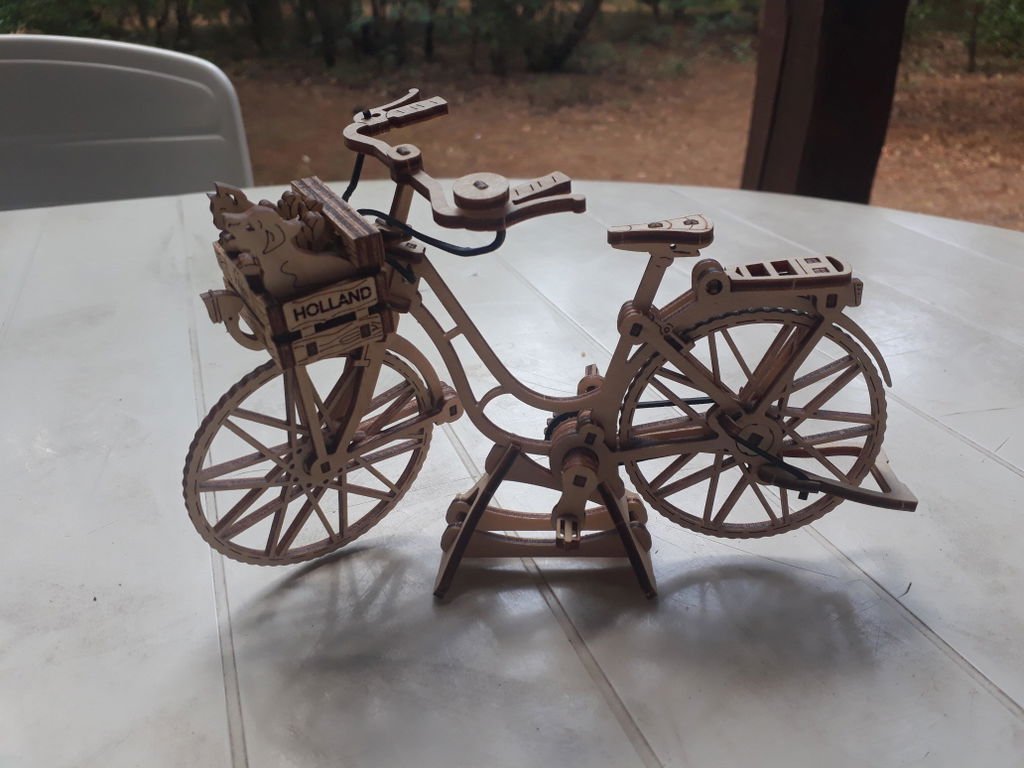
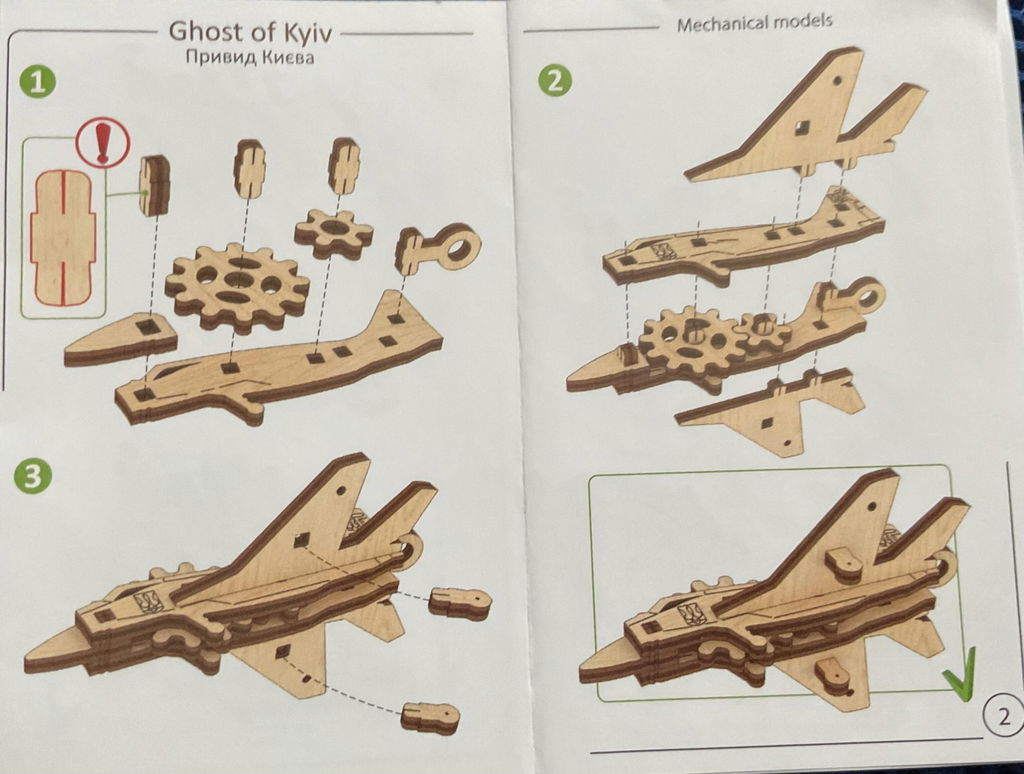
This was fun building. Parts fit together nicely. Gears meshed after a few test runs. Wax and sandpaper were provided. It runs down the hallway not too fast and not too slow but just right. I am happy with it and contributing to Ukraine.